Help! My Tenants Painted Over Mould!
There are hundreds of landlord horror stories to be told, with many different sets of circumstances and outcomes.
One surprisingly common occurrence is that of tenants painting over mould.
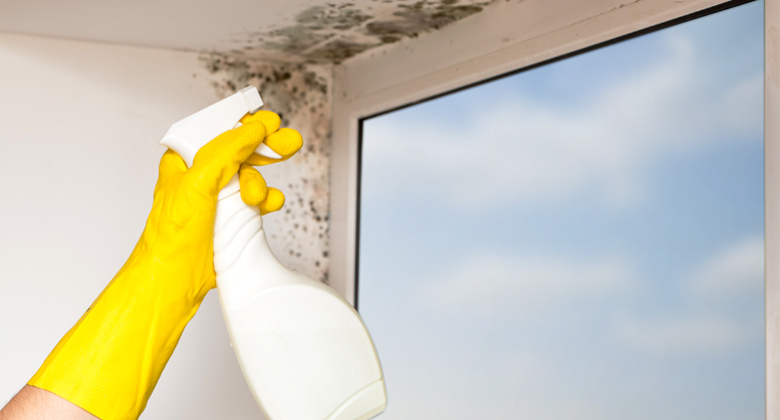
Mould, as we all know, isn’t a pleasant sight in properties, but there are plenty of ways to deal with it and prevent it from happening again, which we’ll look at shortly.
First, Who’s Responsible?
Instances of mould in a property are a common source of conflict between landlords and tenants. The tenant doesn’t want to live in a property affected by mould, while at the same time the landlord doesn’t want to see their property affected by mould, either.
So, who’s responsible?
It comes down to the source of the mould. The problem with mould is that it can be difficult to prove how it came to be there in the first place.
In general:
- If the mould is caused by damp due to a structural problem with the property, leaky pipes, or the failure of damp proofing, the landlord is responsible.
- If the mould is caused by condensation, due to a lack of ventilation or inadequate heating (assuming the landlord has dealt with any boiler maintenance issues), the tenant is responsible.
The problem for both parties here is that it’s going to be difficult to prove who is at fault. You could even have two surveyors or damp experts who disagree on the source of the mould!
Landlord Notes
When the tenant moves out you can ask for a damp expert to assess your property and give you an opinion on what the source of the mould is. If the damp expert concludes there are no structural issues, leaky pipes, or dodgy damp proofing, then you can reasonably conclude that the damp is due to the tenant not adequately controlling the climate or taking steps to reduce condensation. You can therefore deduct the cost of cleaning and redecorating from the tenant’s deposit.
At the same time, the tenant can get their own report that may state the property has structural defects that cause damp, which could see you as the landlord held responsible.
If you aim to deduct from the tenants deposit and they dispute this, the burden of proof will be on the tenant. If they are unable to prove there is a structural defect with the property, you will win the case.
How Can You Prevent Mould in the First Place?
Like with anything in life, prevention is better than cure.
While as a landlord you’ve done your job if you provide a property that is sound structurally as well as mould free, you’re then leaving the property to the mercy of your tenants. If you use a letting agent and don’t inspect the property yourself, you’re also leaving yourself at the mercy of the agent and trusting them to carry out their periodic inspections correctly. Overall though, it is up to the tenant to notify you (or the letting agent) of any instances of damp occurring, and to do everything they can to prevent this happening in the first place.
That all being said, there are some additional actions that will help you minimize the likelihood of mould occurring in your property:
- The best way to prevent any issues is to make sure you don’t rent your property out to problem tenants in the first place. Ensure you comprehensively reference your tenants and question any issues that arise. You can instruct Upad to complete your tenant referencing here.
- When you decorate, use anti-mould paint, particularly in common areas where mould occurs, such as the kitchen and the bathroom.
- Alternatively, you can use anti-bacterial paint additive, which is cheaper than anti-mould paint, and mix this with your regular paint before decorating.
- Have extractor fans installed in the bathroom and in the kitchen. The best solution for the bathroom is to have the extractor fan linked to the light, so when the light is switched on, the extractor fan comes on. In the kitchen, the extractor fan should be above the cooker. Ensure these are set up to overrun for 20 minutes after they’re switched off. This is a common feature in most modern extractor fans, but if you’re having a new one fitted you’ll need to make sure it’s set up correctly.
- Use tiling where possible in the bathroom and in the kitchen. These are a lot more mould resistant than plasterboard, walls, and paint, and you can get anti-mould grout for between the tiles, too.
- Take responsibility for having the gutters cleaned regularly, especially if your property is close to tall trees and regularly has leaves building up in the guttering.
- Check the property thoroughly for leaks before, during, and after each let. If you aren’t doing the periodic inspections yourself, ensure your letting agent is reporting whether there are any leaks each time they send you the quarterly inspection report.
- If you do have a mould problem, make sure you remove it completely. Any left behind mould spores at all will simply multiply and you’ll have a huge problem again in the near future.
- This one sounds obvious, but make sure you don’t have a mould problem before you let out the property!
- Provide the property with a dehumidifier (or two) to cover yourself further in the event of any future disputes. Properties that are naturally warm and damp tend to be a problem in this respect, but providing dehumidifiers regardless is definitely worth it.
- If a dehumidifier doesn’t do the trick, a costly option (though one that may be worth it in the long term) is to install a PIV loft unit. This pushes dry air into the property from the loft and maintains humidity at a level that doesn’t allow mould to form.

Help! My Tenants Painted Over Mould
Now to the problem at hand. As you may have already learned the hard way – or learned by reading this far if you haven’t experienced it first hand – painting over mould isn’t going to do anything to help. In fact, it could make it look even worse than it actually is.
Diagnosis
The first thing you need to do is check whether it’s actually mould that you’re dealing with.
The best way to do this is to apply bleach to the affected area. If the ‘mould’ gets lighter, then you have a confirmed diagnosis of mould. If it doesn’t, then it might just be dirt, and your tenants have left your property in a scruffy state (though if they’ve painted over dirt and you can still see it, it must be a really bad paint job!)
Cleaning the Affected Surface
Now what you want to do is remove as much of the dirt and fresh paint from the surface as you possibly can. This will give you a full appreciation of what you’re dealing with.
Warm soapy water and a decent sponge or scouring pad is all you need to use at this stage. Given that the paint won’t have bonded onto the mould properly, the fresh layer of paint applied by your tenants should lift off fairly easily.
Stripping Off the Original Layer of Paint
Remember what we said earlier about needing to deal with all of the mould and not leave even a trace behind?
In order to achieve that, we’re going to need to strip off the original layer of paint too, so you can check beneath it and clean if necessary. This will also help you see whether there are any cracks coming through the plaster or walls underneath, which may indicate a larger damp or structural problem.
You have two options here:
- Strip the paint manually with a scraper. It’ll take longer, but it might be good therapy for you if you’re angry at your tenants for leaving your property in such condition.
- Go to B&Q or another DIY store and buy some paint remover. You don’t need to spend big money on a brand version – unless you’re removing paint from a specific surface where you might need to use Nitro-Mors – just buy an ‘own brand’ paint remover, this will do the job.
If you opt for the paint remover, simply follow the instructions on the bottle, and within an hour you should have the paint off the surface.
At this stage, you’ll be able to see whether you have mould on the walls or if it was just on the paint. If you have mould on the walls, you’ll need to invest in a mould removal kit, which usually cost around £30 and gives you a protective mask and gloves as well as everything needed to remedy your problem. Follow the instructions on the mould removal kit before moving on.
If you strip the paint and there is no mould to be seen, then you’ve got lucky, and can move on immediately.
Wipe Down the Surface
Before you repaint – or tile – the surface, you first need to wipe it down. This will remove any residue that remains on the surface, as well as preventing paint removal solution from drying on the surface, which will then affect your ability to repaint it later.
Once you have done this, wipe the area dry, and leave it for a couple of days to ensure no mould re-appears.
Apply Anti-Mould Solution, Use Anti-Bacterial Paint Additive, or Use Anti-Mould Paint
If you’re planning to tile the surface in question, then you don’t need to do anything else, you’re done.
If you’re repainting, you now need to choose what to do:
- Decide whether to apply anti-mould solution to the surface before repainting. We recommend you do this.
- Choose whether you are going to repaint the surface with anti-mould paint, or add anti-bacterial paint additive to your existing paint. Choose whichever option you like.
Do you really need to apply the anti-mould solution even if you’re using additive-added or anti-mould paint? We would. You might end up with a mould problem again in the future, but it’s something else that you’ve done to try and stop the problem, and will stand you in good stead if you end up looking to make deductions from your tenants’ deposit.
Tell Us Your Horror Stories
What did your tenants do that shocked you and cost you a lot more to fix than you hoped? Have you ever had to make deductions to a tenants deposit because of an issue like mould, or have you even found yourself issuing a section 21 notice because your inspections highlighted issues that were clearly down to negligence on the part of your tenants?
Get in touch and tell us your horror stories, and we’ll provide similar useful tips and guides related to the problem for the most common ones in the future!